Cleanroom Smoke Studies And Airflow Visualization: When To Use Them And How To Read Results

A cleanroom smoke study (also called an airflow visualization study) makes airflow visible so you can confirm whether clean air protects your critical work zone, components, and product. You use it when you need evidence of how air behaves in the real setup, not just what a drawing or setpoint says. This article explains when smoke studies are worth doing and how to read the results in a way that supports decisions and documentation. If you need support planning, running, or documenting a smoke study, our cleanroom engineering services can help.
Most teams run into smoke studies for one of three reasons:
- You are commissioning a new cleanroom or making changes under change control.
- You are troubleshooting environmental monitoring trends or excursions.
- Or you need to confirm that operator movement and equipment loads are not disrupting unidirectional airflow at the work position.
What A Cleanroom Smoke Study Is, And What It Is Not
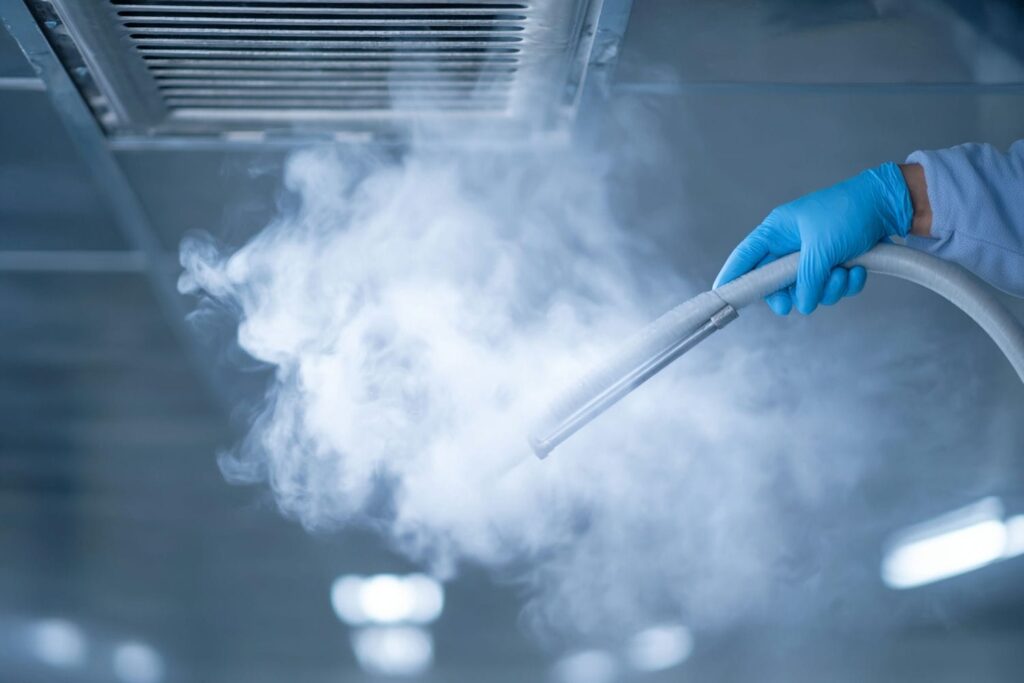
A smoke study is simple in concept but easy to misapply. You release a visible tracer and watch how it moves. The value is not the “smoke” itself. The value is what the tracer reveals about airflow paths around real obstacles like operators, carts, fillers, isolator openings, pass-throughs, and warm equipment surfaces.
A good smoke study is also repeatable. If the same setup produces different patterns each run, you have not learned “how the room works.” You have learned that the test conditions were not controlled, or the airflow is unstable.
What a Smoke Study Demonstrates in Practice
A cleanroom smoke study is a controlled airflow visualization exercise that shows how air moves within a room or zone and how it interacts with people, equipment, and openings. In practice, teams use it to confirm “first air” protection over critical surfaces, to demonstrate that air is not carrying contamination from lower-cleanliness areas, and to identify risk points before finalising operating practices.
It is also a strong communication tool. Video makes it easier to explain risk to QA, operations, and stakeholders who do not live in airflow data every day.
What It Does Not Replace
A smoke study does not replace quantitative cleanroom qualification. You still need the right program for filter integrity, pressure differentials, airflow velocity checks, particle classification, recovery, and the other verification activities your quality system requires. When those programs need to be coordinated into a single, defensible qualification strategy, cleanroom engineering support can help align testing, documentation, and decision-making.
Think of smoke studies as “behavioural evidence” for airflow. They help you decide where to measure, what to correct, and what to re-check. They do not, by themselves, prove a room meets ISO classification limits or GMP expectations for control.
Common Misunderstandings
One common misunderstanding is believing that “more smoke equals better data.” Heavy tracer release can create a plume that behaves differently than the air you are trying to evaluate. You want enough tracer to see the flow, but not so much that it becomes the dominant feature.
Another misunderstanding is treating a single “at rest” video as proof the process is protected. In many facilities, the highest-risk conditions are dynamic: operator interventions, door cycles, material transfers, and equipment heat loads. If you do not test those, you are often testing the wrong problem.
When To Use A Smoke Study
Smoke studies are most valuable when you need to answer a specific question about contamination risk and airflow protection. If the question is vague, the result is usually vague too. Before you schedule a smoke study, define what you are trying to prove and what you will do if the pattern is not acceptable.
As a rule, smoke studies pay off when you are dealing with critical zones, exposed product, aseptic manipulations, or any setup where people and equipment can block or disturb airflow.
The High-Value Triggers
Use a smoke study during commissioning and qualification when you want to confirm that the airflow design intent works in the installed condition. It is also useful after any change that can affect airflow paths, such as HEPA terminal unit changes, diffuser or return relocations, balancing changes, or pressure cascade adjustments.
You should also consider smoke studies after layout or process changes. New equipment footprints, new operator positions, added heat loads, and new transfer steps can create turbulence and stagnation in places that were previously stable. If you are investigating excursions or recurring EM findings, a smoke study can help you identify a physical mechanism instead of guessing.
At Rest Vs In Operation
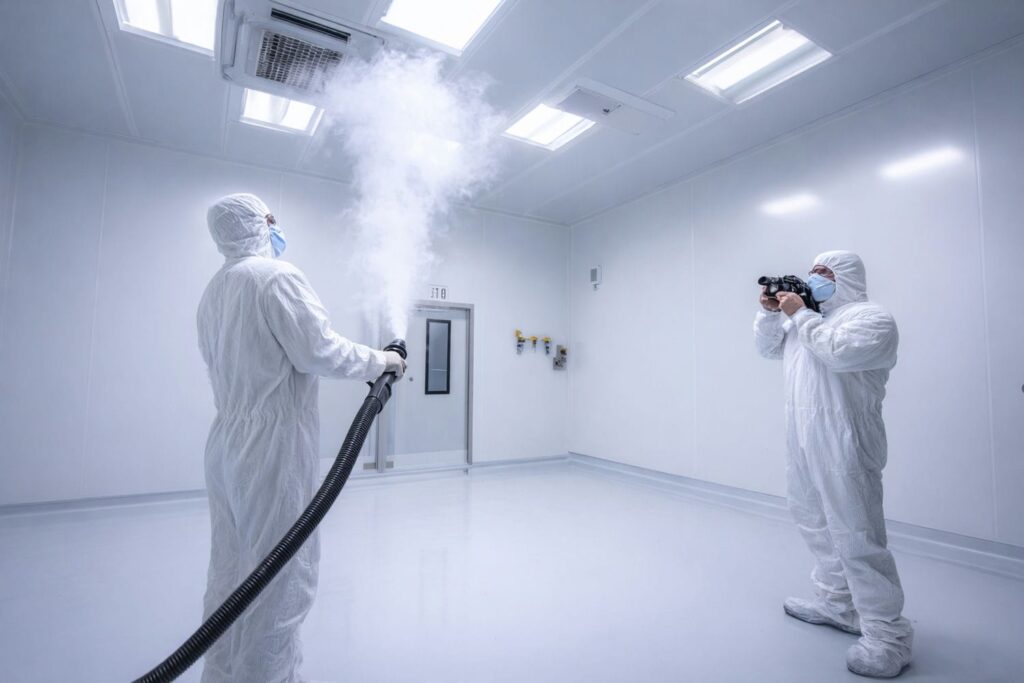
“At rest” shows baseline airflow with the installation complete and HVAC operating, but without personnel and with major equipment not performing routine work. “In operation” reflects the room running as it does during production or simulated routine work, typically with the maximum number of personnel and normal activities or interventions.
Health Canada’s sterile manufacturing guidance explicitly calls for airflow pattern studies both “at rest” and “in operation”, including simulated operator interventions, and notes that video recordings should be retained and outcomes documented.
Situations Where a Smoke Study Provides Actionable Insight
The table below helps you decide when a smoke study is likely to change decisions, not just produce another video.
| Trigger Event | Why A Smoke Study Helps | Typical Scope | What To Document |
| New cleanroom commissioning | Confirms design intent in installed condition | Critical zones, returns, doors, pass-throughs | Room state, HVAC settings, camera angles, conclusions |
| New equipment added or moved | Reveals dead zones, turbulence, blocked returns | Around equipment edges, work position | Equipment state, heat loads, operator locations |
| HVAC balancing or setpoint changes | Shows whether patterns stayed stable | Supply-to-return paths, pressure cascade interfaces | “Before vs after,” any new reflux or stagnation |
| Process interventions increased | Tests highest-risk actions | Glove placement, reach-in, material handling | Simulated interventions, timing, repetitions |
| EM trends or excursions | Connects results to a physical cause | Sampling points vs airflow behaviour | Findings, root cause hypotheses, CAPA actions |
| Door events or airlock behaviour | Identifies ingress risk | Door opening sequence, recovery, airflow direction | Door cycle timing, pressure behaviour, video evidence |
| Barrier system interface risk | Confirms protection at openings | RABS/isolator interfaces, transfer ports | Interface conditions, worst-case scenarios |
Where Smoke Studies Fit In Your Overall Cleanroom Testing And Documentation
Smoke studies work best when you treat them as part of a larger qualification and contamination control story. A video is compelling, but the decisions around it should be based on risk and corroborated by other evidence. That is especially true if you are using the results to justify changes to procedures or monitoring.
If you only collect airflow videos without defining how you will interpret them, you can end up with “evidence” that is hard to defend. A stronger approach is to use smoke studies to confirm airflow protection, then align quantitative tests and monitoring with what the airflow is actually doing.
How It Complements Common Test Programs
Smoke studies complement airflow velocity checks, balancing, and pressure differential verification by showing whether those numbers translate into protective airflow in the critical zone. You can have “good” average velocities while still having problematic eddies behind a piece of equipment or reflux at an opening.
FDA’s aseptic processing guidance notes that smoke studies, along with multi-location particle data, can help during qualification to assess whether proper particle control dynamics have been achieved in the critical area.
What Auditors And QA Typically Want To See
Auditors and QA usually want to see intent, scope, and traceability. They want to know which areas you evaluated, under what conditions, and why those conditions represent risk. They also want to see conclusions that lead to action when needed, not just video files stored on a drive.
If you test dynamic conditions, describe them precisely. Capture what equipment and supplies were present, how many people were involved, and what activities were simulated. This level of detail helps turn a “cool video” into a defensible record.
Government Guidance Touchpoint
Sterile manufacturing guidance often connects airflow visualization directly to contamination risk control. For example, Health Canada states that airflow patterns should be visualized to demonstrate key behaviours, including no ingress from lower- to higher-grade areas and avoiding airflow that passes over operators or less-clean surfaces before reaching higher-grade areas.
How To Run A Smoke Study That Produces Useful Results
A smoke study should answer a defined question with controlled conditions. That means planning for repeatability, choosing scenarios that reflect real work, and documenting enough detail that someone else can interpret the outcome later. The goal is not to make the room look perfect. The goal is to learn whether airflow protects the process and where it does not.
If you are already under change control or responding to deviations, plan the study like an investigation. Decide what you will test first, what you will hold constant, and what “good enough” looks like for your critical zone.
Step 1: Define Purpose And Acceptance Criteria Before You Film
Start with a short purpose statement that names the critical zone and the risk you are evaluating. Examples include confirming first-air protection at the point of fill, confirming no ingress at an airlock door, or evaluating whether an operator intervention disrupts unidirectional airflow.
Then define acceptance criteria in practical terms. For instance, you might expect airflow to move smoothly from the supply through the critical zone without sustained reflux, pooling, or turbulence that persists at the work position. If you cannot describe what “pass” looks like in words, you will struggle to defend your conclusion.
Step 2: Plan The Scenarios
Plan an at rest baseline so you can separate “room issues” from “people and process issues.” Then plan in operation scenarios that reflect routine work and the most stressful, contamination-relevant activities. The most useful scenarios often include set-up, interventions, material transfers, glove changes, and door cycles.
Include “worst reasonable case” without staging unrealistic chaos. If operators never lean into the critical zone during normal work, do not invent that scenario. However, if interventions do occur, simulate them consistently so you can compare runs and understand the impact.
Step 3: Set Up The Environment And Capture
Control what you can: HVAC settings, door positions, equipment mode, and who is performing each action. Ensure the tracer release method does not create its own turbulence. Film from angles that show the critical path clearly, and use lighting that makes flow direction and disruption visible.
Capture more than one run of the same scenario. If patterns are consistent across repeats, your result is more reliable. If patterns vary, that is also a result, and it may point to airflow instability, heat load variability, or inconsistent operator practice.
Step 4: Documentation Package
Treat the documentation package as part of qualification evidence. Record room state, scenario details, camera positions, and tracer release points. Use a simple floor plan or sketch so reviewers can understand what they are seeing.
If you need the smoke study to support broader delivery decisions, it helps to align it with the same engineering documentation stack used in cleanroom design and implementation.
How To Read Smoke Study Results
Reading smoke study results is about pattern recognition and cause-and-effect. Start by looking at the intended flow path and asking whether it protects the critical zone. Then look for where the pattern breaks down, and what physical feature causes that breakdown.
Avoid the temptation to over-interpret speed from video alone. Unless you are using calibrated methods, smoke studies are qualitative. Your job is to identify stable versus unstable behaviour, and then decide what to measure or change next.
What “Good” Airflow Typically Looks Like
“Good” airflow typically shows a consistent sweep through the critical zone, with air moving from the cleanest source toward less-clean areas and out through returns without persistent recirculation. In unidirectional zones, you want to see a coherent flow that reaches the work position without being pulled behind obstacles.
You also want repeatability. If the same setup produces the same pattern on repeated runs, you can use the video to support engineering decisions. If the pattern changes run-to-run, you likely need to stabilise the room, the process, or both before you can draw conclusions.
The Red Flags To Recognise Quickly
Watch for turbulence at edges and around equipment. Eddies and swirling often show up near sharp corners, behind tall equipment, or where operators reach into the work zone. These areas can act like contamination traps if particles and microbes are not swept away.
Also watch for reflux, stagnation, and short-circuiting. Reflux shows air reversing toward a critical area. Stagnation shows tracer lingering or pooling. Short-circuiting shows supply air moving straight to a return without flushing the critical zone. These behaviours matter because they often correlate with higher contamination risk during real interventions.
Common Causes Behind What You See
Most airflow problems have simple physical causes. Equipment blocks the supply path. Returns are poorly placed for the actual layout. Heat sources create thermal plumes that pull air in unexpected directions. Door operation and pressure instability drive transient backflow.
When airflow issues show up, they often connect to broader controlled environment design choices. Understanding the HVAC and room engineering context makes it easier to choose corrective actions that solve the root cause instead of masking the symptom.
Turning Observations Into Corrective Actions
Start with low-disruption changes when possible. That might include repositioning work to stay in first air, changing where staging occurs, reducing cross-traffic near critical zones, or adjusting how interventions happen so hands and materials do not block airflow.
If the problem is structural, move to engineering corrections. That can include rebalancing, changing diffuser or return placement, adjusting pressure cascades, adding local shielding, or revising equipment layout. It also helps to connect the findings to airflow fundamentals so teams understand why a change is needed and how it reduces risk.
Choosing Smoke / Fog Media (Including Glycol-Free Options)
Most cleanroom airflow visualization (“smoke”) videos are produced using glycol/glycerin-based fog, similar to the theatrical fog used in entertainment venues. In practice, teams use it because it tends to produce excellent visibility and a neutrally buoyant-looking tracer that makes flow paths, turbulence, and reflux easy to see on camera.
However, some products and processes are glycol-sensitive (or have restrictions on introducing glycols near exposed product, components, or critical surfaces). In those cases, the smoke study is still achievable, but tracer selection becomes a quality, safety, and cost decision as much as an engineering one.
Option 1: Glycol / Glycerin-Based Fog (Common Standard)
Why teams use it: Strong smoke density and clear visual airflow indication, especially for larger spaces and longer camera throws.
Typical use: General airflow visualization, commissioning videos, operator intervention studies, and routine “at rest / in operation” pattern checks.
Key consideration: If there is any concern about product contact risk, residue, or process sensitivity, confirm acceptability with QA before use and define cleaning/wipe-down expectations in the protocol.
Option 2: Ultrapure Water / DI Foggers (Glycol-Free, High-Purity)
For glycol-restricted environments, an alternative is Ultrapure Water/DI fogging, which uses deionized water (and in some setups liquid nitrogen) to generate a high-purity, neutrally buoyant fog.
Why teams choose it: Supports airflow visualization while reducing concerns about glycol exposure in sensitive process areas.
Tradeoff: These systems are typically more expensive and may require more planning (utilities, consumables, and setup) than standard glycol fogging.
Option 3: CO₂ Foggers (Portable, Localized Use)
Another glycol-free option is CO₂ fogging, which can be portable and effective for smaller zones or localized tests.
Why teams use it: Convenience and portability when you need to visualize a specific interface (a small opening, localized capture velocity behavior, or a short diagnostic scenario).
Key considerations: Treat CO₂ fogging as a method that must be planned—ensure the approach does not introduce interpretation issues (for example, fog that behaves differently due to temperature effects) and confirm personnel safety and ventilation controls are appropriate.
Practical rule: Match the tracer to the question and the risk
The “best” smoke is the one that:
- Produces clear visibility at the critical path you need to evaluate
- Behaves in a way that meaningfully represents airflow (without the tracer becoming the dominant “plume”)
- Is acceptable to QA/EHS for the specific room state and exposure scenario
- Can be documented and repeated (same conditions → same patterns)
Documentation tip: In addition to camera angles and scenarios, record the tracer media type, generation method (fogger type), release location, duration/approximate output setting, and any post-test cleaning expectations. This makes the result more defensible during review and easier to reproduce during requalification or investigations.
Common Pitfalls That Make Smoke Studies Misleading
A misleading smoke study is usually the result of poor control of variables or unclear interpretation rules. The most common pitfall is performing the test, saving the video, and assuming it proves compliance without describing what was evaluated and why it is acceptable.
Another pitfall is treating a smoke study as a performance theatre exercise. If the objective is to “get a pass,” teams may unconsciously avoid stressful conditions or ignore visible disruptions that matter to contamination control.
Setup And Execution Pitfalls
If tracer release is weak, intermittent, or not present over the critical areas, the study can become non-informative. FDA training material highlights that smoke that is not robust or continuous over critical areas can limit the value of the result, and that even “passing” studies sometimes show non-uniform or stagnant airflow in critical areas.
Lighting and camera angles also matter more than most teams expect. If reviewers cannot see the critical zone clearly, they cannot assess the risk. Plan the capture like you would plan a validation observation: clear line of sight, consistent scenario execution, and traceable conditions.
Scope And Interpretation Pitfalls
Testing only best-case conditions is a common scope error. If interventions occur during production, they must be evaluated. If doors open during transfers, those events must be evaluated. A cleanroom that looks perfect at rest can still show disruption when people and processes are present.
If you need a high-level orientation to ISO concepts and GMP expectations, use this guide.
What To Do If A Smoke Study Shows Airflow Problems
Airflow problems are not unusual, especially after changes. The key is responding in a controlled way. Treat the result as evidence of a mechanism that needs attention, then decide whether you need immediate controls, longer-term engineering changes, or both.
Do not jump straight to redesign unless the evidence points there. Many issues can be reduced with layout and operational adjustments, especially when the problem is caused by how work is performed within a space that is otherwise stable.
Triage And Immediate Controls
If the study suggests a meaningful risk to product or critical surfaces, consider interim procedural controls while you investigate. That could include restricting certain interventions, changing staging locations, limiting door openings, or adjusting operator positions to maintain first-air protection.
Document the concern, the interim controls, and the plan to investigate. This creates a clear chain from observation to risk management, which helps both operations and QA.
Engineering Investigation Checklist
Start with the basics: verify balancing and pressure relationships, and confirm that supply and return paths match the installed layout. Check for blocked returns, unexpected obstructions, and equipment heat loads that were not present in the original design.
Then connect findings to the change history. Ask what changed since the last known good state. In many cases, the smoke study is not revealing a “new” problem, but a new layout condition that exposes an old weakness.
Rework And Re-Visualise
Make targeted changes and re-test. Where practical, adjust one variable at a time so you can see cause-and-effect. Capture “before and after” evidence with the same camera positions and scenarios.
If the room requires more extensive correction, use the smoke study as one input to a broader corrective action plan that includes quantitative checks. This keeps the response defensible and avoids relying on video alone.
Turning Smoke Study Results Into Defensible Decisions
A cleanroom smoke study is most useful when it leads to clear decisions: what to change, what to document, and what to re-test. If you need airflow visualization to support commissioning, change control, or an investigation, we can help you scope the right scenarios, capture evidence that stands up to QA review, and translate patterns into practical engineering corrections.
ACH Engineering supports smoke studies as part of an integrated delivery approach, including in-house architectural, mechanical, HVAC, and electrical engineering, modular cleanroom layouts that scale with your process, and experience delivering ISO- and GMP-aligned environments across pharmaceutical, biotech, medical device, and laboratory facilities. If you want to discuss your cleanroom risks and the right verification strategy, start with our cleanroom engineering services.
Frequently Asked Questions
A cleanroom smoke study is an airflow visualization test that uses a visible tracer to show airflow direction and behaviour around people, equipment, and critical work zones.
Use smoke studies during commissioning, after airflow-impacting changes (HVAC, filtration, layout, heat loads), and when investigating contamination risk, EM trends, or excursions.
Yes. Guidance for sterile environments commonly expects airflow pattern studies in both states, including simulated operator interventions, with video retained and outcomes documented.
No. Smoke studies are qualitative. They complement quantitative testing such as particle counts, airflow velocity checks, and other qualification activities.
Common failures include turbulence at the work position, backflow into critical areas, stagnant pockets behind equipment, and airflow short-circuiting from supply to return without flushing the critical zone.
Repeat them after significant changes and as part of periodic requalification when your risk assessment and quality system call for it, especially in aseptic or high-risk operations.
Include objective, scenarios tested, room state, equipment and personnel present, tracer release points, camera angles, observations tied to risk, conclusions, corrective actions, and re-test evidence where applicable.
GET IN TOUCH
Complete the form below to get in touch with our team.