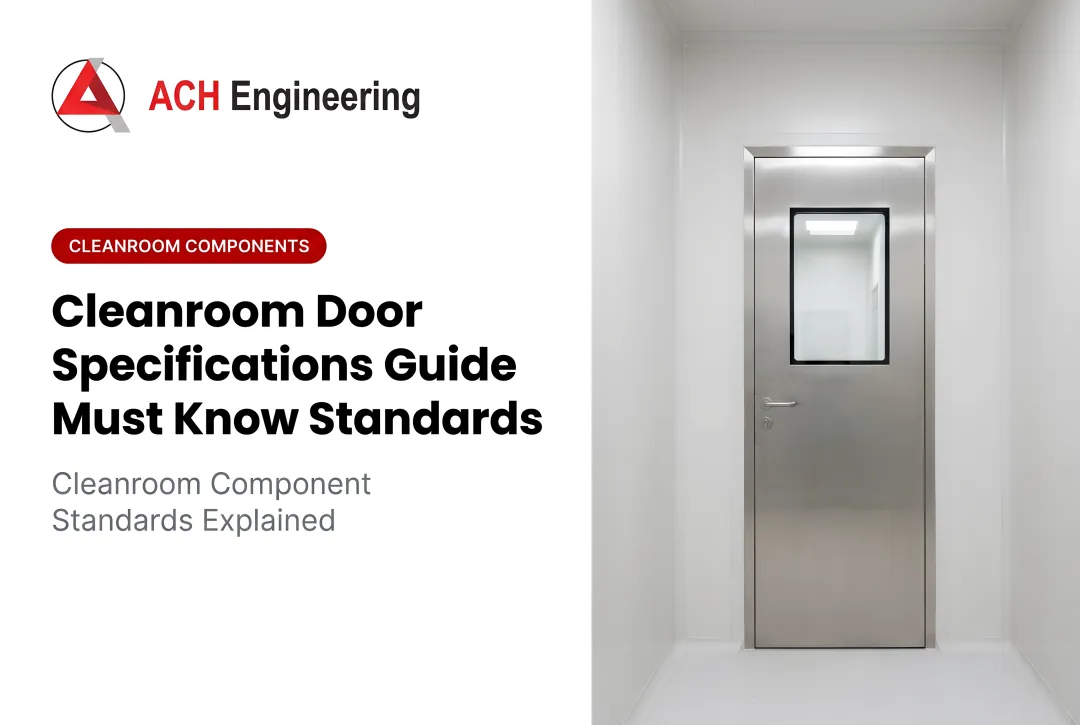
Introduction
Installing cleanroom doors—whether swing or sliding—requires technical precision to maintain environmental controls, proper sealing, and regulatory compliance.
Improper installation compromises contamination control and pressure differentials, directly impacting your facility's performance and regulatory standing.
Who can realistically install cleanroom doors? Trained cleanroom technicians, certified contractors, or specialized installation teams with knowledge of controlled environment requirements. This is not work for general construction personnel without cleanroom experience.
Why installer qualification matters—consequences of incorrect installation include:
- Air leakage disrupting pressure cascades
- Seal failure allowing particle infiltration
- Door misalignment causing operational inefficiency
- Warranty voidance
- Failed regulatory inspections (FDA, ISO 14644)
- Costly remediation and potential production shutdowns
According to FDA Form 483 observations, improperly closing doors in aseptic processing areas have triggered regulatory citations specifically for airflow balance and pressure loss. Industry data suggests approximately 30% of contamination incidents in controlled environments stem from door seal failures or improper operation.
This guide covers correct installation of both swing and sliding cleanroom doors, following industry best practices and regulatory standards. It addresses pharmaceutical, biotech, medical device, and other controlled environment applications across North America.
Key Takeaways
- Precise measurement, proper sealing, and validation maintain contamination control
- Swing doors: accurate frame alignment, reinforced openings, continuous gaskets
- Sliding doors: straight rails, aligned pulleys, limit devices prevent deflection
- Validation confirms seal integrity, ≥10 Pa differential, ISO 14644 compliance
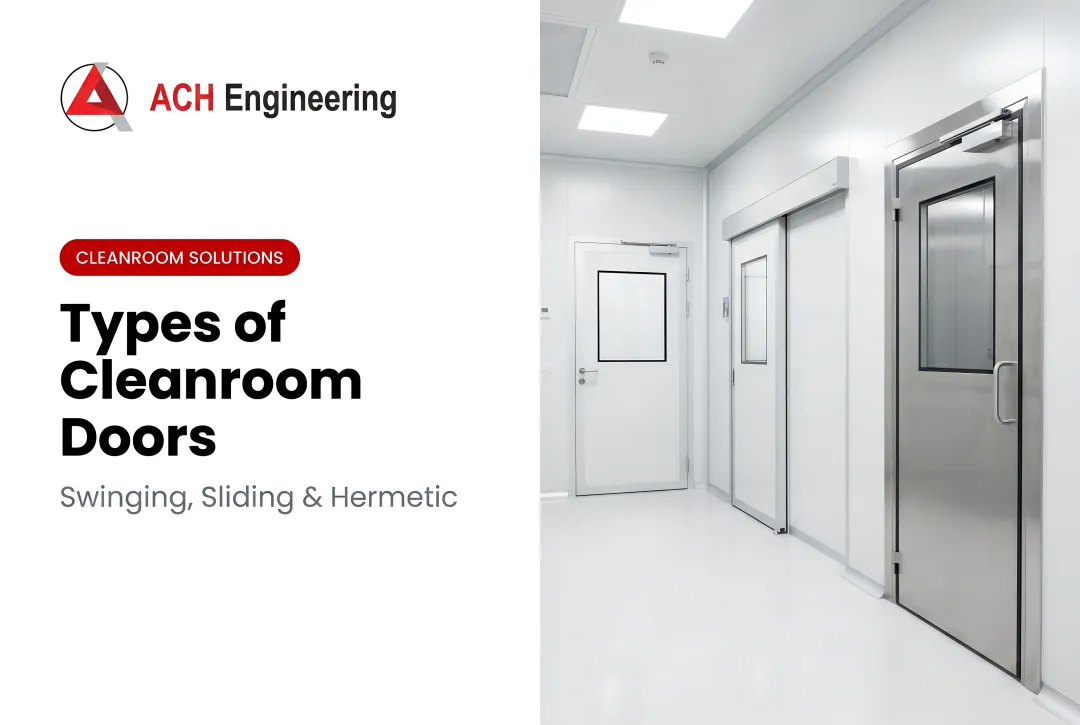
Installation Guide for Cleanroom Doors (Swing and Sliding)
Installing cleanroom doors requires following a precise sequence to maintain environmental integrity. The process flows from site preparation through frame/track installation, door mounting, sealing, hardware integration, and finally validation testing.
Skipping steps or reordering this sequence compromises cleanroom performance.
Set realistic expectations: Swing door installation requires 4-6 hours per door with a 2-person team. Sliding doors require 6-8 hours due to track alignment complexity. Both require cleanroom-specific expertise and coordination with HVAC and pressure systems.
Prerequisites and Safety Considerations
Before beginning installation, confirm your site meets these readiness requirements:
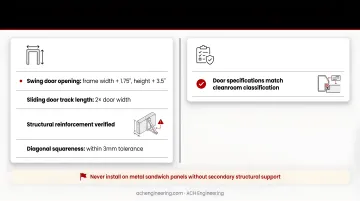
- Wall opening must be precisely measured: door frame width + 1.75", height + 3.5" for swing doors
- Sliding doors need 2x door width for track length
- Structural reinforcement verified—never install on metal sandwich panels without secondary support
- Diagonal measurements within 3mm for square alignment
Verify these compatibility factors before proceeding:
- Door specifications match cleanroom classification (ISO Class 5-8)
- Materials compatible with cleaning agents used (316L stainless steel for Grade A/B, aluminum or HPL for lower grades)
- Seals appropriate for pressure differential (minimum 10 Pa per EU GMP Annex 1)
- Hardware matches access control systems
Follow these safety protocols throughout installation:
- Cleanroom PPE protocols during installation
- Protect existing clean areas with temporary barriers and HEPA filtration
- Comply with NFPA fire codes and ADA standards (5 lbs maximum opening force for interior doors)
Critical requirements—do not proceed if:
- Wall reinforcement is inadequate
- Room pressurization is active during installation
- Door specifications don't match cleanroom class
- Installation team lacks cleanroom training
Tools and Parts Required
Gather these essential tools before starting:
- Laser level for precise alignment
- Power drill with appropriate bits
- Torque screwdriver set
- Measuring tape and square
- Sealant gun for cleanroom-grade silicone application
- Temporary door supports and wedges
You'll need these parts and materials:
- All door components (frame/track, door leaf, hinges/rollers, sealing strips)
- Mounting hardware (screws, anchors appropriate for wall type)
- Cleanroom-grade silicone sealant (non-outgassing, ASTM E595 compliant)
- Shims for adjustment
Specialized requirements:
- For automatic doors: electrical conduit and wiring
- For interlocked systems: control panel access
- For cleanroom access points installation: non-wood materials only, stainless steel hardware for corrosion resistance
How to Install Swing Doors (Step-by-Step)
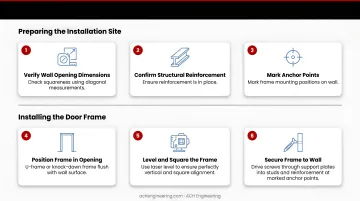
Preparing the installation site:
Start by confirming your opening is ready:
- Verify wall opening dimensions and squareness using diagonal measurements
- Confirm structural reinforcement is in place
- Mark anchor points for frame mounting
Installing the door frame:
- Position U-frame or knock-down frame in opening flush with wall surface
- Use laser level to ensure frame is perfectly vertical and square
- Secure frame using screws through support plates into wall studs/reinforcement at marked anchor points
- Drill straight, not angled, to prevent frame twist
Mounting hinges and door leaf:
- Attach heavy-duty stainless steel hinges to door (3 hinges for double doors, 2-3 for single doors)
- Use provided machine screws—do not overtighten
- Place door on wood wedge/support to align hinge holes with frame cutouts
- Install hinges from top to bottom, ensuring symmetry and straight alignment
Installing hardware and seals:
Key components to install at this stage:
- Door closer (hydraulic, ADA-compliant ANSI/BHMA Grade 1) mounted per manufacturer specs
- Handles and locks at 1m height with backing plate reinforcement
- Continuous perimeter gasket (EPDM or silicone) in concealed frame groove
- Gaskets should compress approximately 1/8 inch (3mm) when door closes
Sealing and final adjustments:
- Apply cleanroom-grade silicone between door frame and wall panels with consistent bead width
- Ensure door swings freely without binding (adjust shims between hinge and frame if needed)
- Test door closer operation and adjust closing speed (minimum 5 seconds from 90° to 12° per ADA)
- Install window (if applicable) with tempered glass and concealed fasteners
Validation checks:
- Close door and check for consistent gap around perimeter (typically 3-5mm)
- Check seal compression when door closes
- Test lock/latch engagement
- Confirm no air leakage using smoke test or pressure differential measurement
How to Install Sliding Doors (Step-by-Step)
Sliding door installation follows a different approach due to the track system.
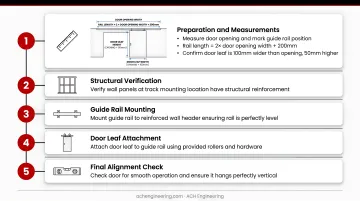
Preparing for track installation:
Begin with these measurements and verifications:
- Measure door opening and mark guide rail position (rail length = 2x door opening width + 200mm)
- Verify wall panels at track mounting location have structural reinforcement
- Confirm door leaf is 100mm wider than opening, 50mm higher
Installing the guide rail system:
- Mount guide rail to reinforced wall header ensuring rail is perfectly straight and level using laser level
- Confirm rail has adequate load-bearing capacity for door weight (up to 200 kg for heavy doors)
- Install guide rail cover if specified
- Ensure rail extends properly beyond door opening on both sides
Mounting door and pulley system:
- Attach top pulleys to door frame ensuring perpendicular alignment
- Lift door and engage pulleys with guide rail
- Check that pulleys roll smoothly along entire rail length without binding or wobbling
- Adjust pulley tension if needed
Installing limit and sealing devices:
Critical positioning requirements for these components:
- Lateral limit devices on floor at both rail ends (recessed 10mm to prevent collision)
- Longitudinal limit devices in pairs at minimum 3 positions to prevent pressure-induced deflection
- Flat sealing strips (EPDM or silicone) applied to all door edges
Hardware and automation integration:
- For manual doors: install handle at appropriate height
- For automatic doors: run electrical conduit, install sensors or motion pads, connect to controller per ANSI/BHMA A156.10
- Program opening/closing speeds and hold-open times
Final testing and adjustment:
- Test door slides smoothly through full range without exceeding rail limits
- Confirm limit devices engage properly
- Check seal compression maintains pressure differential
- For automatic doors, test sensor activation, opening/closing cycles, and safety features
Common Installation Problems and Fixes
Door Frame Misalignment (Swing Doors)
Problem: Door binds, doesn't close evenly, or has inconsistent gaps around perimeter.
Likely causes:
- Frame installed out of square or not vertical
- Wall opening out of square
- Loose mounting screws
- Improper hinge alignment
Fix:
- Use laser level to verify frame verticality in both directions
- Add shims between hinge leaf and door or frame to adjust alignment
- Ensure all mounting screws are tight and drilled straight, not angled
- Verify diagonal measurements of frame opening match within 3mm (1/8 inch)
Air Leakage and Seal Failure
Problem: Pressure differential not maintained (below 10 Pa), visible gaps, failed smoke test.
Likely causes:
- Sealing strips not properly compressed
- Gaps in silicone application
- Door warping or sagging
- Incorrect seal material for the cleanroom's chemical environment
Fix:
- Verify continuous seal around entire door perimeter with no gaps
- Reapply silicone in gaps with consistent bead width
- Adjust door closer force to ensure proper seal compression (3mm/1/8 inch minimum)
- Replace degraded seals with material compatible with your cleaning agents
- Remember: even a 0.5mm continuous gap can leak 0.3 m³/h at 15 Pa, enough to disrupt airflow and compromise classification
Sliding Door Track Issues
While swing doors face alignment challenges, sliding doors present their own installation complications—particularly under pressure differential conditions.
Problem: Door doesn't slide smoothly, pulleys bind, door deflects under pressure differential.
Likely causes:
- Guide rail not straight or level
- Inadequate wall reinforcement causing rail to sag over time
- Pulley misalignment
- Missing or improperly positioned limit devices
Fix:
- Verify rail straightness with laser level; reinstall if deviation exceeds manufacturer tolerance
- Add structural reinforcement to wall header before reinstalling track
- Adjust pulley alignment so it runs perpendicular to door frame
- Install longitudinal limit devices at minimum 3 positions along the track to prevent pressure-induced deflection

Pro Tips for Installing Cleanroom Doors Effectively
Follow these proven strategies to ensure your cleanroom door installation meets regulatory standards and performs reliably.
Installation timing: Schedule door installation after wall panels and ceiling grid are complete but before final HVAC balancing. This ensures proper integration without disrupting established cleanroom conditions.
Coordinate with other trades to avoid simultaneous work that generates particles.
Seal integrity verification: Use smoke pencil or fog test to check for air leakage around the door perimeter after installation.
Perform pressure differential testing with the door closed to confirm seal effectiveness (minimum 10 Pa between adjacent cleanroom grades). Document baseline measurements for future maintenance reference and regulatory inspections.
Material handling: Always lift and carry doors—never drag across floor. Handle with clean gloves to prevent fingerprints and contamination. Protect door surfaces during installation with removable film. Store doors in clean, dry area away from construction debris.
When to hire specialists: For GMP-regulated facilities, FDA-inspected cleanrooms, or installations requiring validation documentation (IQ/OQ/PQ), engage certified cleanroom contractors with regulatory experience. For automatic door systems with complex controls, use manufacturer-certified installers. For facilities with stringent pressure cascade requirements, coordinate with HVAC commissioning specialists to ensure proper integration.
Conclusion
Proper cleanroom door installation directly impacts contamination control, regulatory compliance, pressure differential maintenance, and long-term operational efficiency.
Poor installation leads to costly remediation and potential production shutdowns—approximately 30% of contamination incidents stem from door seal failures.
Successful installation requires:
- Thorough site preparation and disciplined execution following manufacturer specifications
- Compliance with industry standards (ISO 14644, EU GMP Annex 1)
- Proper validation testing with documented results
- Complete installation documentation for regulatory inspections
These requirements ensure compliant installation that delivers reliable contamination control, reduced energy costs, and successful audits.
For facilities across North America requiring cleanroom door installation, ACH Engineering's cleanroom installation contractors handle the complete process from design through validation, with specialized experience in pharmaceutical, biotech, and regulated industry environments.
Frequently Asked Questions
Can I install cleanroom doors myself, or do I need a professional?
Professional installation is required—cleanroom experience is essential to maintain proper sealing and pressure control. For GMP/FDA-regulated facilities, use certified installers who provide validation documentation (IQ/OQ/PQ) and warranty coverage.
What's the main difference between installing swing doors versus sliding doors?
Swing doors focus on frame alignment and seal compression (4-6 hours). Sliding doors require precise track installation with reinforcement and limit devices to handle pressure differentials—more complex at 6-8 hours per door.
How long does cleanroom door installation typically take?
Swing doors take 4-6 hours per door with a 2-person team, while sliding doors require 6-8 hours due to track alignment complexity. Automatic doors add 2-3 hours for electrical integration.
What are the most common mistakes during cleanroom door installation?
Common mistakes include inadequate wall reinforcement causing misalignment, failing to verify frame squareness with a laser level, using incompatible sealing materials, skipping validation testing, and installing during active cleanroom operations without contamination controls.
How do I verify the door installation maintains proper cleanroom pressure differentials?
Perform a smoke test around the entire door perimeter—no smoke should escape. Use a manometer to measure pressure differential (minimum 10 Pa per EU GMP Annex 1) and conduct validation testing per ISO 14644-3 standards.
Do cleanroom doors require special materials or hardware?
Yes—use non-wood materials (316L stainless steel for Grade A/B, aluminum or HPL for lower grades), cleanroom-grade silicone sealant meeting ASTM E595, ANSI/BHMA Grade 1 stainless hardware, and EPDM/silicone seals resistant to cleaning chemicals and frequent disinfection.